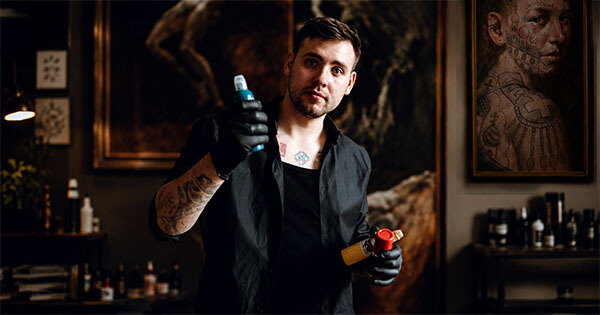
A realism tattoo sleeve is much more than a collection of detailed images covering an arm. When I design a sleeve, I think about the entire composition: how the main subjects connect, how the design moves around the arm, and how the finished piece will look from different angles.
I'm Andrey Kolbasin, a realism tattoo artist based in Los Angeles. I specialize in large-scale custom tattoos, including full sleeves, portraits, color realism, and black and grey compositions.
Over the years, I've learned that the most important decisions often happen before the first tattoo session. Choosing the right reference images, establishing a visual hierarchy, and planning the transitions can make a major difference to the finished work.
Here's how I approach planning a realism tattoo sleeve, and what I recommend considering before starting one.
Choose a Theme Before Choosing Images
One of the most common starting points for a sleeve is a collection of photographs or tattoo references. You might like a portrait, a skull, an animal, a historical character, or a particular visual atmosphere.
That's useful, but I usually want to understand the larger idea first.
What should the sleeve communicate? Is there a story behind it? Do you want something dramatic and cinematic, or a quieter composition built around texture, light, and detail?
For example, a sleeve inspired by Norse mythology might combine a warrior, ornamental details, symbolic elements, and atmospheric backgrounds. Those subjects can share a visual language.
A completely unrelated collection of images may be much harder to combine without making the result feel fragmented.
My advice: Bring the references you like, but don't feel that you need to design the entire sleeve yourself. My job is to turn your ideas into one coherent composition.
Plan the Whole Arm, Not Just the Front
The arm is a three-dimensional surface. A sleeve that looks perfect in a flat digital mockup can feel very different when wrapped around the body.
The shoulder, upper arm, elbow, forearm, and wrist all have different shapes. The skin moves and stretches as the arm changes position.
This is why I don't treat a sleeve as one long rectangular image.
I consider where the main focal point will sit, which parts should connect, and how the design will look when viewed from the front, side, and back.
Establishing a Focal Point
Most strong sleeves have a visual hierarchy. A large portrait, for example, may become the main subject, while architecture, flowers, smoke, or other elements support it.
If every image has the same contrast, scale, and level of detail, the eye doesn't know where to look first. I prefer to create areas of emphasis and quieter transitions between them.
Connecting the Elements
Backgrounds are not simply empty spaces that need to be filled. They can connect different subjects, control movement, and help the sleeve read as one piece.
Depending on the design, I might use shadow, natural forms, atmospheric effects, or overlapping elements. The best transition is the one that belongs to the composition rather than competing with it.
Designing Realism That Works on Skin
Realism depends heavily on convincing light, texture, proportions, and depth. But a tattoo isn't a photograph.
Skin has its own limitations, and a design needs to remain visually readable beyond the first close-up photograph taken after a session.
For a large sleeve, I pay particular attention to contrast and the distribution of detail. Some areas can carry complex realistic textures. Others benefit from simpler shapes or more open space.
A sleeve shouldn't depend entirely on tiny details to communicate its main idea. I want the composition to feel convincing at a distance as well as up close.
Important: A good reference image is a starting point, not necessarily a design that should be copied directly onto the arm. Composition and proportions often need to be adapted.
Color Realism or Black and Grey?
I work with both color realism and black and grey tattoos. Neither is automatically the better choice for a full sleeve.
Black and grey can create dramatic depth through lighting, shadow, and contrast. It often works well with realistic portraits, historical subjects, architecture, and darker atmospheric compositions.
Color introduces another set of possibilities. It can establish focal points, separate subjects, and create a particular mood. It can also become an important part of the overall narrative.
What matters to me is consistency. A color sleeve doesn't need every section to be equally bright, just as a black and grey sleeve doesn't need every area to be equally dark.
I choose the palette and contrast according to the composition, not simply according to how many colors or details can fit into it.
You can explore both directions in my color tattoo portfolio and black and grey portfolio.
Realism Tattoo Sleeve Examples
Different subjects require different compositional decisions. A landscape benefits from continuity and depth, while a detailed figure or portrait may need a stronger central focus.
These examples show how large subjects, backgrounds, light, and color can be arranged around the arm.
For more examples, explore my tattoo sleeves and realism tattoo portfolio.
Choosing the Right References
Reference photographs are an important part of planning a realistic tattoo. Their quality affects how accurately I can study facial features, lighting, textures, and proportions.
If you're planning a portrait, try to find a clear image with sufficient resolution and visible detail. Strong lighting can be helpful, but heavy filters and excessive digital sharpening often make the image less useful.
You can also send mood references: photographs, paintings, cinematic images, or examples of visual styles you admire. They don't all need to look alike.
I use those references to understand what you're drawn to and decide how the design can be adapted for the arm.
If the reference doesn't contain enough usable detail, we may need to choose another image or adjust the idea. Realism works best when the source material supports the final composition.
How Long Does a Realism Sleeve Take?
A full realism sleeve is a multi-session project. The amount of time depends on coverage, composition, detail, skin, and the techniques involved.
I work in full-day tattoo sessions, with a standard appointment lasting six hours. As a general planning reference, a full sleeve may take around five to eight sessions, although individual projects vary.
I don't like treating the number of sessions as a guarantee before reviewing the design. A sleeve with several detailed portraits may require a different amount of work from a composition with larger shapes and simpler backgrounds.
My General Process
Initial Consultation
We discuss your idea, references, placement, color direction, and scope.
Composition Planning
I develop the design around the anatomy and establish its main visual structure.
Full-Day Sessions
The sleeve develops over multiple appointments, with each stage contributing to the complete design.
Healing and Completion
We plan the next appointments with appropriate healing time and assess the work as the project progresses.
You can learn more about the overall process on my tattoo FAQ page.
Keeping the Sleeve Visually Connected
A black and grey sleeve can include several detailed subjects without becoming visually chaotic. What matters is the way the elements relate through contrast, rhythm, and background transitions.
I use differences in scale and lighting to guide the eye. A detailed focal point may sit beside a quieter area, while supporting forms connect the upper arm to the forearm.
This is why I think about the entire sleeve before concentrating on individual sections. The finished tattoo should feel like one complete work rather than separate images placed next to each other.
What I Recommend Avoiding
Before starting a realism sleeve, I recommend avoiding a few common planning mistakes.
- Choosing too many unrelated subjects. A sleeve benefits from a clear direction rather than a collection of images competing for attention.
- Trying to fit everything into one area. Important subjects need enough room to remain readable.
- Ignoring the back of the arm. The composition needs to work around the arm, not just from one angle.
- Using poor-quality references. A low-resolution photograph may not provide the detail needed for convincing realism.
- Planning each tattoo independently. If you want a complete sleeve, it's better to consider the overall structure before filling individual sections.
- Underestimating the time commitment. A detailed full sleeve takes multiple sessions and appropriate healing time.
The goal isn't to make the planning process unnecessarily complicated. It's to avoid decisions that become difficult to change later.
A Sleeve Should Feel Like One Complete Work
For me, the strongest realism sleeves are not necessarily the ones with the largest number of subjects or the most complicated details.
They're the ones where composition, anatomy, light, and subject matter work together.
A good sleeve has a clear direction from the shoulder to the wrist. Each element supports the larger idea, and the design feels complete from different viewpoints.
If you're thinking about starting a realism sleeve, bring me your ideas and references. We can figure out which elements belong in the composition and how to build them into a unified design.
Let's Plan Your Realism Tattoo Sleeve
I'm based in Los Angeles and work on large-scale custom tattoo projects. If you have an idea for a full sleeve, send me a description of the concept and any references you'd like me to see.
The initial consultation is free. We can discuss your preferred style, composition, placement, and how to approach the project.
REQUEST A CONSULTATION